The Magic of Growing Roses from Seed
Roses are among the most beloved flowers in the world, cherished for their beauty, fragrance, and the deep symbolism they carry across cultures. While most gardeners acquire their roses as potted plants or bare-root specimens from nurseries, there is a uniquely rewarding way to grow roses that few people explore: starting them from seed. Growing roses from seed is a journey of patience, discovery, and horticultural wonder that connects you to the very essence of plant propagation.
Unlike purchasing a named rose variety from a garden center, growing roses from seed introduces an element of surprise and originality. Each seed is a genetic individual, carrying a unique combination of traits inherited from its parent plants. The rose that grows from your seed may have a flower color, form, or fragrance that is unlike any other rose in the world. This genetic diversity is what makes seed-grown roses so fascinating and why many rose breeders and enthusiasts are drawn to this method of propagation.
The process of growing roses from seed requires patience, as it can take two to three years from seed planting to first bloom. But for those willing to invest the time and care, the reward of seeing a one-of-a-kind rose flower for the first time is an experience that few other gardening activities can match.
Understanding Rose Hips and Seed Formation
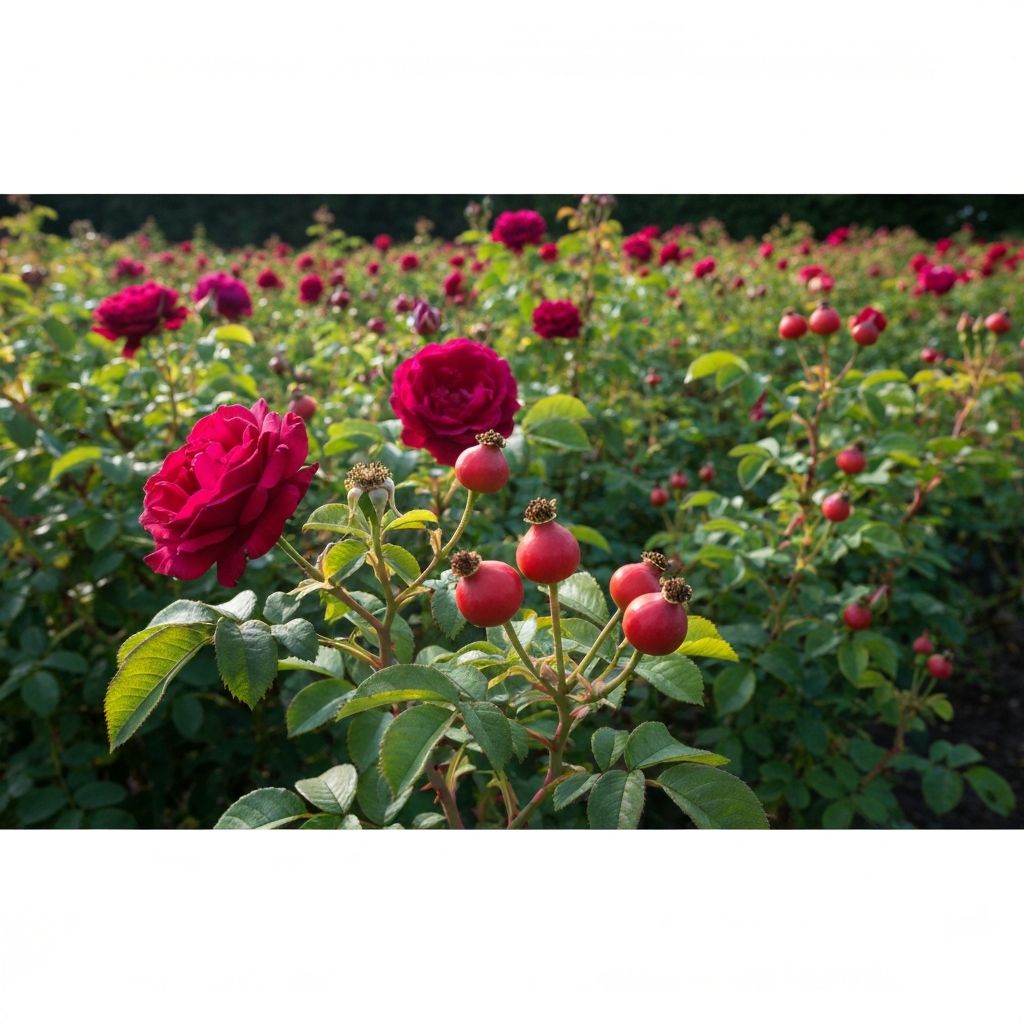
Rose seeds are found inside rose hips, the rounded, berry-like structures that form on rose bushes after the flowers have been pollinated and the petals have fallen. Rose hips typically begin to develop in late summer and continue to ripen through autumn, gradually changing color from green to orange, red, or deep burgundy as they mature.
Each rose hip can contain anywhere from a few to several dozen seeds, depending on the variety of rose and the success of pollination. The seeds are embedded in a fibrous, fleshy pulp that must be removed before the seeds can be processed and planted. Not all rose varieties produce hips readily. Modern hybrid tea roses, for example, are often bred for flower production rather than fruit set and may produce few or no hips. Species roses, shrub roses, and old garden roses are generally the most prolific hip producers.
The timing of hip harvest is important for seed viability. Hips should be allowed to ripen on the bush until they are fully colored and slightly soft to the touch, indicating that the seeds inside have had sufficient time to mature. Harvesting hips too early can result in immature seeds that have a lower germination rate. However, waiting too long can allow the hips to become overripe and begin to decompose, potentially damaging the seeds.
Harvesting and Extracting Rose Seeds
The first step in the seed-growing process is harvesting ripe rose hips from the parent plant. Choose hips from roses with characteristics you admire, such as a particular flower color, form, or fragrance. If you have access to roses that have been naturally or intentionally cross-pollinated, the seeds may produce offspring with interesting combinations of traits from both parent plants.
Once the hips are harvested, the seeds must be extracted from the fleshy pulp. The simplest method is to cut each hip open with a sharp knife and carefully remove the seeds with your fingers or a small spoon. The seeds are small, tan to light brown in color, and have a slightly hairy or fuzzy texture. Some gardeners prefer to soak the hips in water for a day or two before extracting the seeds, as this softens the pulp and makes separation easier.
After extraction, the seeds should be rinsed thoroughly under running water to remove all traces of pulp. Any remaining pulp can promote mold growth during the stratification process, reducing the chances of successful germination. Once clean, the seeds can be inspected for quality. Viable seeds are plump and firm, while hollow or shriveled seeds are unlikely to germinate and should be discarded.
Some experienced growers recommend soaking the cleaned seeds in a dilute hydrogen peroxide solution (about one teaspoon per cup of water) for 30 minutes to disinfect them and reduce the risk of fungal contamination. After soaking, the seeds should be rinsed with clean water and patted dry before moving on to the stratification process.
The Stratification Process
Stratification is a critical step in growing roses from seed that mimics the natural winter conditions that rose seeds would experience in the wild. In nature, rose hips fall to the ground in autumn, and the seeds inside spend the winter months exposed to cold, moist conditions. This cold period breaks the seed's dormancy, signaling to the embryo that winter has passed and it is safe to germinate when temperatures warm up in spring.
To stratify rose seeds at home, you will need a small container, some moist paper towels or peat moss, and a refrigerator. Place the cleaned seeds on a damp paper towel, fold the towel over the seeds, and place the wrapped seeds inside a sealed plastic bag or container. Store this container in the refrigerator at a temperature of approximately 35 to 40 degrees Fahrenheit (1 to 4 degrees Celsius).
The stratification period for rose seeds typically lasts six to ten weeks, though some species may require longer periods. During this time, check the seeds periodically to ensure that the paper towel remains moist but not waterlogged. If you notice any signs of mold, remove the affected seeds and treat the remaining seeds with a dilute fungicide solution.
Some growers have found success with a warm-cold stratification method, where seeds are first exposed to warm, moist conditions (around 70 degrees Fahrenheit) for four to six weeks before being moved to the cold stratification phase. This two-step approach can improve germination rates for certain rose species by mimicking the full seasonal cycle more closely.
Planting Rose Seeds
After the stratification period is complete, the rose seeds are ready to be planted. Some seeds may have already begun to germinate in the refrigerator, showing small white root tips emerging from the seed coat. These germinated seeds should be planted immediately and handled carefully to avoid damaging the delicate emerging root.
Prepare small pots or seed trays filled with a well-draining seed-starting mix. A blend of peat moss, perlite, and vermiculite works well, providing the moisture retention and aeration that rose seedlings need. Plant each seed approximately one-quarter inch deep, covering it lightly with the growing medium. Water gently to moisten the soil without dislodging the seeds.
Place the planted containers in a bright, warm location where temperatures remain between 65 and 75 degrees Fahrenheit. A sunny windowsill or a growing area with supplemental lighting is ideal. Rose seeds can take anywhere from two weeks to several months to germinate, so patience is essential. Keep the soil consistently moist but not saturated, and avoid placing the containers in direct, harsh sunlight, which can dry out the soil surface too quickly.
As seedlings emerge, they will initially produce cotyledons (seed leaves) followed by their first true leaves. The true leaves of rose seedlings are typically compound, with three to five leaflets arranged along a central stem. At this stage, the seedlings are fragile and should be protected from drafts, extreme temperatures, and pests.
Caring for Rose Seedlings
Once your rose seedlings have developed their first set of true leaves, they can be gradually acclimated to more light and outdoor conditions. This process, known as hardening off, involves gradually increasing the seedlings' exposure to direct sunlight, wind, and temperature fluctuations over a period of one to two weeks. Begin by placing the seedlings outdoors in a sheltered location for a few hours each day, gradually increasing the duration and exposure until they are comfortable spending the entire day outside.
Feeding rose seedlings with a dilute liquid fertilizer can promote healthy growth. Use a balanced fertilizer formulated for seedlings or young plants, applied at half the recommended strength. Avoid over-fertilizing, as this can burn the delicate roots and cause more harm than good. As the seedlings grow larger, you can gradually increase the fertilizer concentration to full strength.
When seedlings have developed several sets of true leaves and are large enough to handle, they can be transplanted into individual pots or directly into the garden. Choose a planting location that receives at least six hours of direct sunlight per day, has well-draining soil, and is protected from strong winds. Roses are sun-loving plants, and adequate light is essential for strong growth and eventual flowering.
Watering should be consistent and thorough, allowing the soil to dry slightly between waterings. Roses prefer deep, infrequent watering over shallow, frequent irrigation. Mulching around the base of the plants helps retain soil moisture, suppress weeds, and regulate soil temperature.
From Seedling to First Bloom
The journey from seed to first bloom is a test of patience. Most seed-grown roses will not produce their first flowers until their second or third year of growth. During the first year, the plant focuses on establishing a strong root system and building vegetative growth. The second year typically brings more vigorous top growth, and by the third year, most seed-grown roses will produce their first flowers.
The first bloom from a seed-grown rose is always a moment of excitement and anticipation, because you truly do not know what to expect. The flower may resemble one or both of the parent plants, or it may exhibit entirely new characteristics that are unique to your seedling. Flower color, petal count, fragrance, and form can all vary widely among seed-grown roses, reflecting the genetic diversity inherent in sexual reproduction.
If your seedling produces a rose that you find particularly beautiful or interesting, you can propagate it vegetatively through cuttings or budding to create genetically identical copies. This is, in fact, how all named rose varieties are produced: a breeder grows thousands of seedlings from controlled crosses, selects the best individuals, and propagates them clonally for commercial sale.
Common Challenges and How to Overcome Them
Growing roses from seed is not without challenges. Low germination rates are common, particularly with hybrid rose seeds. It is normal for only a fraction of planted seeds to germinate, so planting a generous number of seeds increases your chances of success. Fungal diseases, particularly damping off, can kill seedlings before they have a chance to establish. Using sterile growing media, providing good air circulation, and avoiding overwatering can help prevent fungal problems.
Pests such as aphids, spider mites, and fungal diseases like powdery mildew and black spot can affect rose seedlings just as they do mature plants. Regular inspection and early intervention with organic or chemical controls can keep these issues in check. Providing optimal growing conditions, including adequate sunlight, proper watering, and good soil nutrition, builds strong, healthy plants that are more resistant to pests and diseases.
Conclusion: The Reward of Growing Roses from Seed
Growing roses from seed is a journey that rewards patience, curiosity, and a love of gardening. From the initial harvest of rose hips to the magical moment of first bloom, the process connects you to the fundamental cycles of plant life and the infinite possibilities of genetic variation. Each seed-grown rose is a unique creation, a living testament to the wonder of nature and the joy of cultivation.
Whether you are an experienced rose grower looking for a new challenge or a curious gardener eager to explore the world of plant propagation, growing roses from seed offers a deeply satisfying experience that enriches your garden and your understanding of these magnificent plants.
