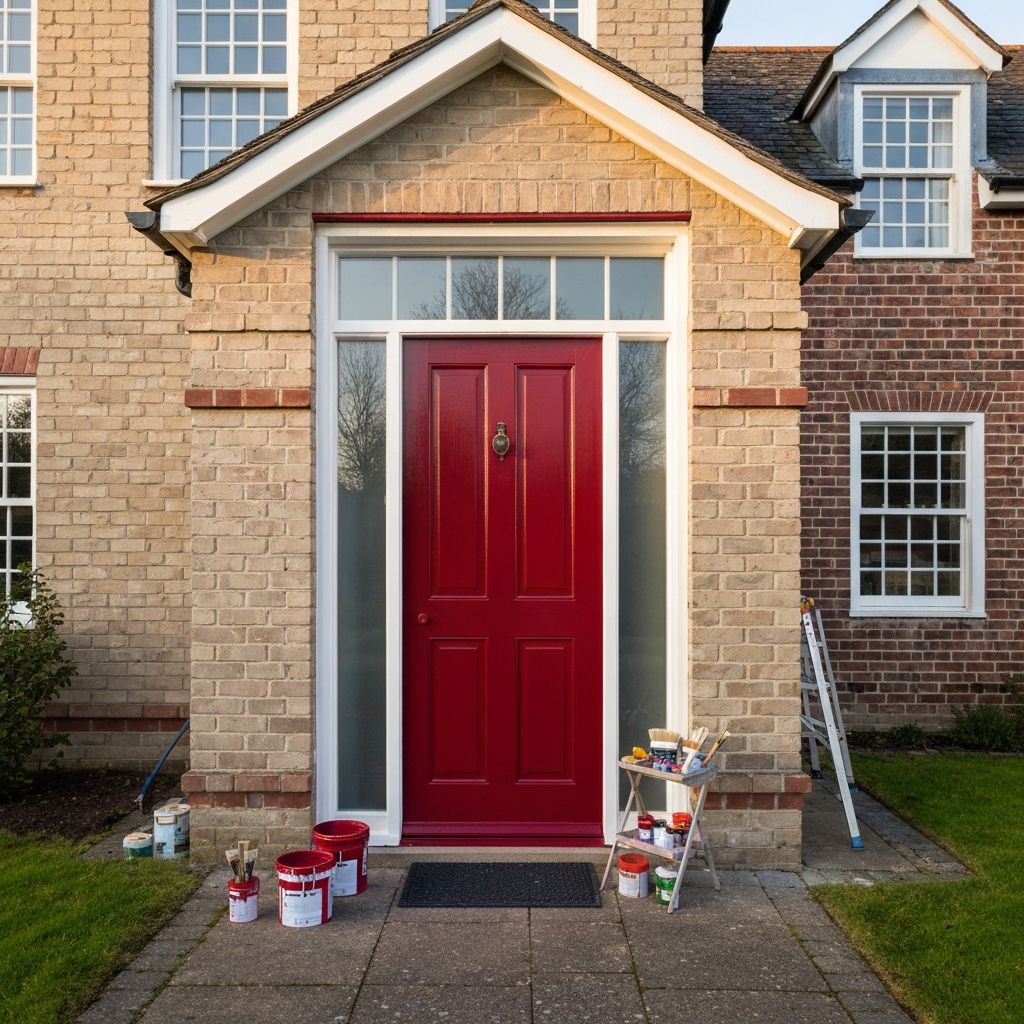
Why Steel Doors Need Special Attention
Steel doors are prized for their durability, security, and energy efficiency, making them a popular choice for both residential and commercial properties. However, unlike wood doors that are naturally porous and readily accept paint, steel doors present unique challenges that require specific techniques and materials to achieve a professional-quality finish. Understanding these challenges and how to address them is the key to a successful steel door painting project.
The primary challenge with steel doors is adhesion. Steel is a non-porous material, meaning that paint cannot soak into the surface the way it does with wood. Instead, the paint must bond mechanically to the surface through a combination of proper preparation, priming, and the use of paints formulated for metal adhesion. Without proper preparation, paint applied to a steel door will peel, chip, and flake, often within months of application.
Another challenge unique to steel doors is rust. When the protective finish on a steel door is compromised, whether through scratches, dents, or simple wear and tear, the exposed steel is vulnerable to oxidation. Rust not only looks unsightly but also weakens the structural integrity of the door and undermines any new paint applied over it. Addressing existing rust and preventing future rust formation are essential components of any steel door painting project.
Choosing the Right Paint for a Steel Door
Selecting the right paint is crucial for achieving a durable and attractive finish on a steel door. There are several options available, each with its own advantages and considerations. The three main types of paint used on steel doors are latex (water-based) paint, oil-based (alkyd) paint, and direct-to-metal (DTM) paint.
Latex paint is the most popular choice for DIY painters due to its ease of use, quick drying time, and low odor. Modern exterior latex paints have been formulated with advanced resins that provide excellent adhesion to metal surfaces when properly primed. They also offer good flexibility, which is important for steel doors that expand and contract with temperature changes. For most residential steel door painting projects, a high-quality exterior latex paint with a semi-gloss or gloss finish is an excellent choice.
Oil-based paint provides a harder, more durable finish than latex and is often recommended for high-traffic areas and doors that are exposed to extreme weather conditions. However, oil-based paint takes longer to dry, has a stronger odor, requires mineral spirits for cleanup, and is subject to stricter environmental regulations in some areas. Despite these drawbacks, many professional painters still prefer oil-based paint for steel doors due to its superior adhesion and durability.
Direct-to-metal (DTM) paint is a specialty product designed specifically for metal surfaces. DTM paints combine primer and topcoat in a single product, simplifying the painting process while providing excellent adhesion and corrosion resistance. While DTM paints are more expensive than standard paints, they can save time and effort by eliminating the need for a separate primer coat. They are an excellent choice for steel doors in commercial or industrial settings where maximum durability is required.
Essential Preparation Steps
The success of any steel door painting project depends primarily on the quality of the surface preparation. Skipping or rushing the preparation steps is the single most common cause of paint failure on steel doors. Proper preparation ensures that the paint bonds firmly to the surface and provides long-lasting protection against the elements.
Begin by removing the door from its hinges if possible and laying it flat on sawhorses. Working with the door horizontal eliminates the risk of drips and runs and allows for more even paint application. Remove all hardware, including the doorknob, deadbolt, hinges, and any other mounted accessories. Cover any glass panels with painter's tape and paper.
Next, clean the door thoroughly to remove all dirt, grease, and contaminants. Use a solution of warm water and a degreasing detergent or TSP (trisodium phosphate) to wash the entire surface, paying special attention to areas that are frequently touched. Rinse with clean water and allow the door to dry completely.
Inspect the door for any areas of rust. If rust is present, remove it completely using a wire brush, sandpaper, or a chemical rust remover. Any rust left under the new paint will continue to grow and will eventually cause the new finish to fail. After removing the rust, apply a rust-inhibiting primer to the bare metal areas to prevent recurrence.
Sanding for Optimal Adhesion
Sanding the entire surface of the steel door is essential for creating the mechanical bond that holds the paint in place. Using 150 to 220 grit sandpaper, lightly scuff the entire door surface, including any previously painted areas. The goal is not to remove all the existing paint but to create a rough texture that gives the new primer and paint something to grip onto.
Pay special attention to any glossy areas, as gloss finishes are particularly resistant to paint adhesion. These areas may require more aggressive sanding or the application of a liquid deglosser to dull the surface. After sanding, wipe the door thoroughly with a tack cloth to remove all dust and debris. Any dust left on the surface will be trapped under the new paint, creating bumps and imperfections in the finish.
Priming the Steel Surface
A high-quality primer is the foundation of a successful steel door paint job. The primer provides several critical functions: it improves the adhesion of the topcoat, it provides additional corrosion protection, it creates a uniform base color that allows the topcoat to achieve full coverage in fewer coats, and it seals any bare metal areas that may be prone to rust.
Choose a primer that is specifically designed for metal surfaces. Rust-inhibiting primers are ideal for steel doors, as they contain additives that actively prevent rust formation. Apply the primer in thin, even coats using a foam roller for flat surfaces and an angled brush for recessed panels and edges. Allow the primer to dry completely according to the manufacturer's instructions, which is typically one to two hours for latex-based primers and four to six hours for oil-based primers.
One coat of primer is usually sufficient for doors in good condition, but two coats may be needed for doors with significant rust damage, bare metal areas, or when changing from a dark to a light color.
Applying the Topcoat
With the primer dry and the surface properly prepared, it is time to apply the topcoat. The key to a professional-quality finish on a steel door is to apply multiple thin coats rather than one or two thick coats. Thin coats dry more evenly, are less prone to drips and runs, and provide a smoother, more durable finish.
Begin by stirring the paint thoroughly. Do not shake the can, as shaking introduces air bubbles that can mar the finish. Pour a small amount of paint into a clean tray and load your foam roller lightly, rolling off the excess on the tray's ramp. Apply the paint in long, smooth strokes, working from top to bottom and maintaining a wet edge to prevent lap marks.
For doors with recessed panels, paint the panels first using an angled brush, then roll the flat stiles and rails. This sequence ensures that any brush marks in the panels are covered by the roller on the adjacent flat surfaces, creating a more uniform appearance. Apply two to three thin coats, allowing each coat to dry fully before applying the next.
Choosing the Right Finish
The sheen or finish of the paint affects both the appearance and the durability of the painted surface. For steel doors, semi-gloss and gloss finishes are generally recommended. These finishes are more durable than flat or satin finishes, easier to clean, and more resistant to moisture and the elements. The reflective quality of gloss finishes also highlights the smooth surface of a well-prepared steel door, creating an attractive and professional appearance.
Flat and satin finishes, while less durable, can be appropriate for interior steel doors or in situations where a more subdued aesthetic is desired. However, they are generally not recommended for exterior steel doors, as they are less resistant to weathering and more difficult to clean.
Drying and Curing
Understanding the difference between drying and curing is important for the longevity of your paint job. Paint is considered dry to the touch when the surface is no longer tacky, which typically occurs within one to four hours depending on the type of paint and environmental conditions. However, the paint is not fully cured, meaning it has not reached its maximum hardness and durability, for several weeks.
During the curing period, the painted surface is more vulnerable to damage from impacts, chemicals, and heavy use. Avoid closing and latching the door forcefully, leaning objects against it, or exposing it to harsh chemicals during this time. Full curing typically takes 21 to 30 days, after which the paint reaches its maximum hardness and durability.
Maintenance and Touch-Up Tips
Maintaining a painted steel door is relatively straightforward. Clean the door periodically with a mild soap and water solution to remove dirt and grime. Avoid abrasive cleaners or scrub pads that can damage the finish. Inspect the door annually for any signs of paint damage, such as chipping, peeling, or rust spots, and address these issues promptly with touch-up paint to prevent further deterioration.
For touch-ups, lightly sand the damaged area, apply a thin coat of primer if bare metal is exposed, and then apply one or two thin coats of the original paint color. Feather the edges of the touch-up area into the surrounding paint to create a seamless repair. Keeping a small amount of the original paint on hand for touch-ups ensures a perfect color match and makes maintenance quick and easy.
Conclusion
Painting a steel door is a project that rewards careful preparation and attention to detail. By properly cleaning, sanding, and priming the surface, choosing the right paint and finish, and applying thin, even coats with patience and care, you can achieve a professional-quality finish that protects your door and enhances the appearance of your property. Whether you are refreshing the look of your front door or restoring a weathered commercial entrance, the techniques outlined in this guide will help you achieve results that are both beautiful and durable.
