Why Ice Cream Is Perfect for Drawing Practice
Ice cream is one of the most popular and enjoyable subjects for drawing practice because it combines simple geometric shapes with opportunities for creative expression. An ice cream cone is essentially built from a triangle and circles, making it accessible for beginners and young artists while still offering plenty of room for adding detail, texture, and personality as your skills improve. Whether you are a complete beginner picking up a pencil for the first time or an experienced artist looking for a fun warm-up exercise, drawing ice cream is a delightful way to practice fundamental art skills.
Drawing food in general is excellent practice because it teaches you to observe shapes, proportions, textures, and colors in everyday objects. Ice cream in particular offers a wonderful range of textures to practice: the smooth, rounded curves of scoops, the crosshatched waffle pattern of a cone, the glossy drip of melting ice cream, and the variety of toppings that add visual interest. In this tutorial, we will start with a simple ice cream cone and gradually build up to more detailed and creative variations.
Materials You Will Need
You do not need expensive art supplies to draw great ice cream illustrations. For beginners, a standard number 2 pencil, an eraser, and plain white paper are all you need to get started. As you become more comfortable, you may want to explore different tools that can enhance your drawings.
A set of colored pencils adds vibrancy and life to your ice cream drawings. Look for a basic set of 12 to 24 colors that includes various pinks, browns, whites, and yellows for realistic ice cream colors, as well as brighter colors for creative interpretations. Markers or felt-tip pens are great for bold, cartoon-style ice cream drawings. Fine-tip black markers in sizes 0.3 to 0.5 millimeters are ideal for outlining and adding detail. If you prefer digital drawing, a basic drawing tablet or even a smartphone drawing app can work perfectly well for this tutorial.
Step One: Drawing the Basic Cone Shape
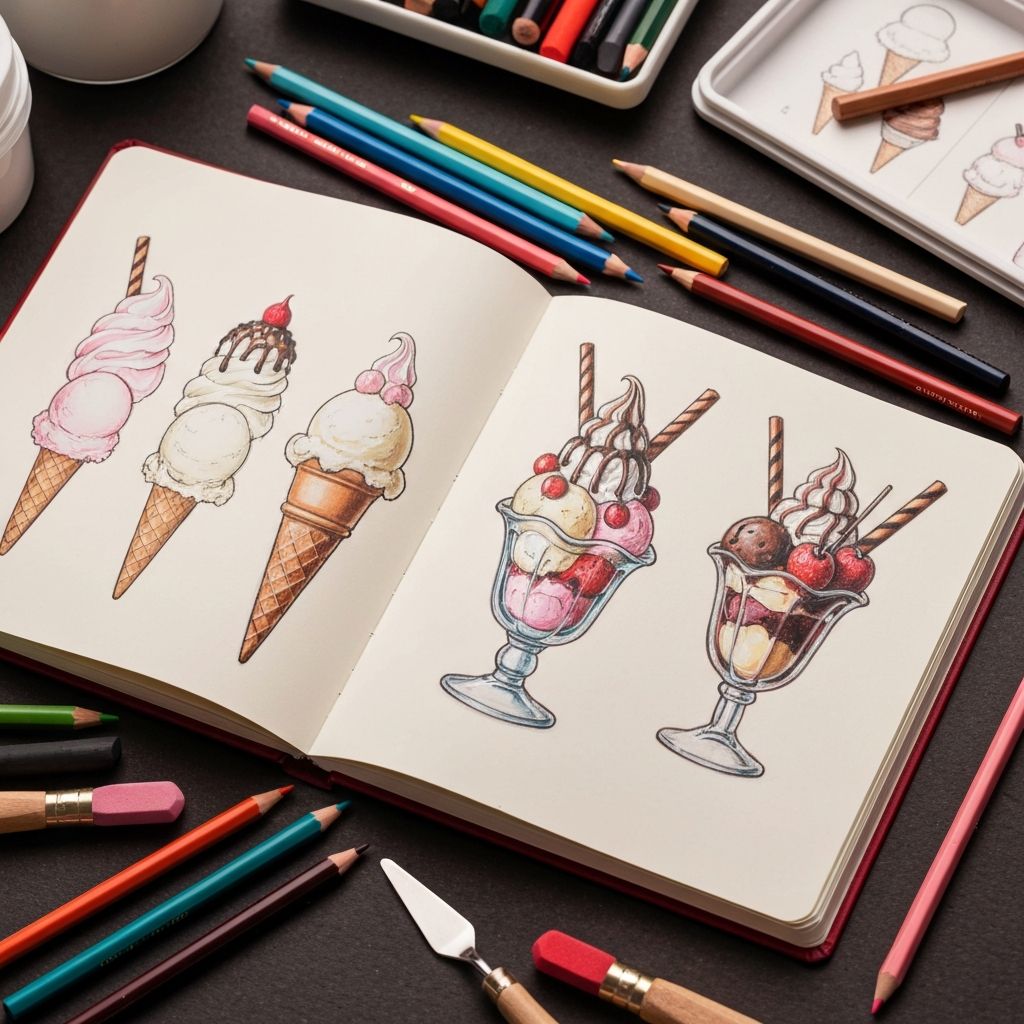
Start by drawing an inverted triangle in the lower portion of your paper. This will be the cone. The triangle should be slightly wider at the top than a perfect geometric triangle, with gently curved sides rather than perfectly straight lines. This slight curve gives the cone a more natural, three-dimensional appearance. The point at the bottom should be slightly rounded rather than perfectly sharp, as real waffle cones have rounded tips.
Add the waffle texture to the cone by drawing a series of diagonal lines running from the upper left to the lower right, spaced about a quarter inch apart. Then draw another set of diagonal lines running from the upper right to the lower left, creating a crosshatch or diamond pattern across the entire cone surface. Keep the lines light and slightly irregular to mimic the natural texture of a waffle cone. The crosshatch pattern is one of the most satisfying textures to draw and instantly makes the cone look realistic.
Step Two: Adding the Ice Cream Scoop
At the top of the cone, draw a large circle or slightly irregular oval shape. This is your ice cream scoop. The bottom of the scoop should overlap slightly with the top edge of the cone, sitting inside it rather than balanced perfectly on top. Real ice cream scoops are never perfectly round, so adding slight lumps, bumps, and irregular curves makes the scoop look more natural and appetizing.
To give the scoop a three-dimensional appearance, add a subtle curved line about one-third of the way down from the top of the scoop. This shadow line suggests the roundness of the scoop and adds depth to your drawing. You can also add a small highlight area near the top of the scoop by leaving a small section unshaded or lighter than the surrounding area, which suggests light reflecting off the smooth surface of the ice cream.
Step Three: Adding Details and Toppings
Now comes the fun part: adding details that bring your ice cream drawing to life. Start with drips. Draw two or three wavy, elongated teardrop shapes descending from the bottom edge of the scoop where it meets the cone. These melting drips instantly make the drawing feel dynamic and realistic. The drips should be thicker at the top where they connect to the scoop and taper to a point or rounded end as they descend.
Add toppings based on your preference. For sprinkles, draw small rectangles and cylinders scattered across the surface of the scoop at various angles. For chocolate chips, add small teardrop or triangle shapes. For a cherry on top, draw a small circle at the peak of the scoop with a curved line extending upward for the stem. Whipped cream can be represented by a swirled mound of curved lines stacked on top of the scoop.
Step Four: Coloring and Shading
Coloring transforms a simple line drawing into a finished illustration. For the cone, use warm yellows and light browns, applying darker shading in the crosshatch crevices and along the edges of the cone. For the ice cream scoop, choose your favorite flavor color. Vanilla uses soft yellows and creams, chocolate uses warm browns, strawberry uses pinks and reds, and mint uses light greens. Apply color in smooth, curved strokes that follow the roundness of the scoop.
Shading is what separates a flat drawing from one that appears three-dimensional. The lightest area of the scoop should be near the top where light hits it directly, and the color should gradually darken toward the bottom and edges. The area where the scoop meets the cone should be the darkest, suggesting shadow. Use a white colored pencil, gel pen, or simply leave the paper white to create highlights that suggest a shiny, glossy ice cream surface. For the drips, use the same base color as the scoop but slightly darker, and add a tiny highlight line along one edge of each drip to suggest the glossy, wet surface of melting ice cream.
