Why Choose a Metal Roof?
Metal roofing has surged in popularity among homeowners and builders, and for good reason. A properly installed metal roof can last 50 to 70 years — two to three times longer than a traditional asphalt shingle roof. Metal roofs are highly resistant to wind, rain, hail, and fire. They reflect solar heat, reducing cooling costs in warm climates by 10 to 25 percent. They are environmentally friendly, often made from recycled materials, and are fully recyclable at the end of their long lifespan.
Despite these advantages, many homeowners are intimidated by the prospect of installing a metal roof. The process is different from shingling, and mistakes can be costly. However, with the right tools, materials, and a methodical approach, a metal roof installation is a manageable project for experienced DIYers — and understanding the process is valuable even if you plan to hire a professional contractor.
Choosing Your Metal Roofing Material
Before you climb a ladder, you need to select the right metal roofing material for your project. The most common options include standing seam panels, corrugated metal panels, and metal shingles or tiles.
Standing Seam: This is the most popular and aesthetically versatile option. Panels feature raised seams that interlock for a clean, modern look and superior weather resistance. Standing seam panels are available in steel, aluminum, and copper, in a wide range of colors and finishes.
Corrugated Metal: Characterized by its wavy, ridged profile, corrugated metal is an affordable and durable option often associated with agricultural and industrial buildings. However, modern corrugated panels are available in attractive colors and profiles suitable for residential use.
Metal Shingles and Tiles: These products mimic the appearance of traditional shingles, slate, or clay tiles while delivering the performance benefits of metal. They are installed individually rather than as large panels, making them a good option for complex roof geometries.
Consider your climate, budget, aesthetic preferences, and the slope of your roof when making your selection. Consult with your material supplier about the best product for your specific application.
Tools and Materials You Will Need
A successful metal roof installation requires the right tools. Here is a comprehensive list of what you will need: measuring tape, chalk line, speed square, tin snips or electric metal shears, power drill with metal-appropriate bits, roofing screws with neoprene washers, pop rivet gun, caulk gun with metal roof sealant, ladder and roof brackets for safety, fall protection harness, underlayment material, drip edge flashing, ridge cap, valley flashing, and closure strips.
Investing in quality tools pays dividends in both the ease of installation and the quality of the finished product. Cheap tin snips, for example, will fatigue your hands quickly and produce ragged cuts, while a good pair of aviation snips or electric shears will make clean, precise cuts all day long.
Step 1: Prepare the Roof Deck
Metal roofing can be installed over an existing asphalt shingle roof in some cases, but for the best results, start with a clean, solid roof deck. Remove old roofing materials down to the plywood or OSB sheathing. Inspect the decking for rot, damage, or soft spots, and replace any compromised sections with new sheathing.
Install a high-quality synthetic underlayment over the entire roof deck. This provides a secondary moisture barrier beneath the metal panels. Overlap seams by at least six inches and secure the underlayment with cap nails or staples. In cold climates, apply an ice-and-water shield membrane along the eaves and in any valleys to prevent ice dam damage.
Step 2: Install Drip Edge and Flashing
Drip edge flashing is installed along the eaves and rakes of the roof before the metal panels go on. It directs water away from the fascia board and into the gutter system. Secure the drip edge with roofing nails spaced every 12 inches. At corners, overlap the pieces by at least two inches and seal the joint with metal roof sealant.
Valley flashing should be installed in any roof valleys where two slopes meet. Use a wide, W-shaped valley flashing that directs water down the valley and away from the seam. Secure it with clips or screws along the edges, being careful not to puncture the center channel where water flows.
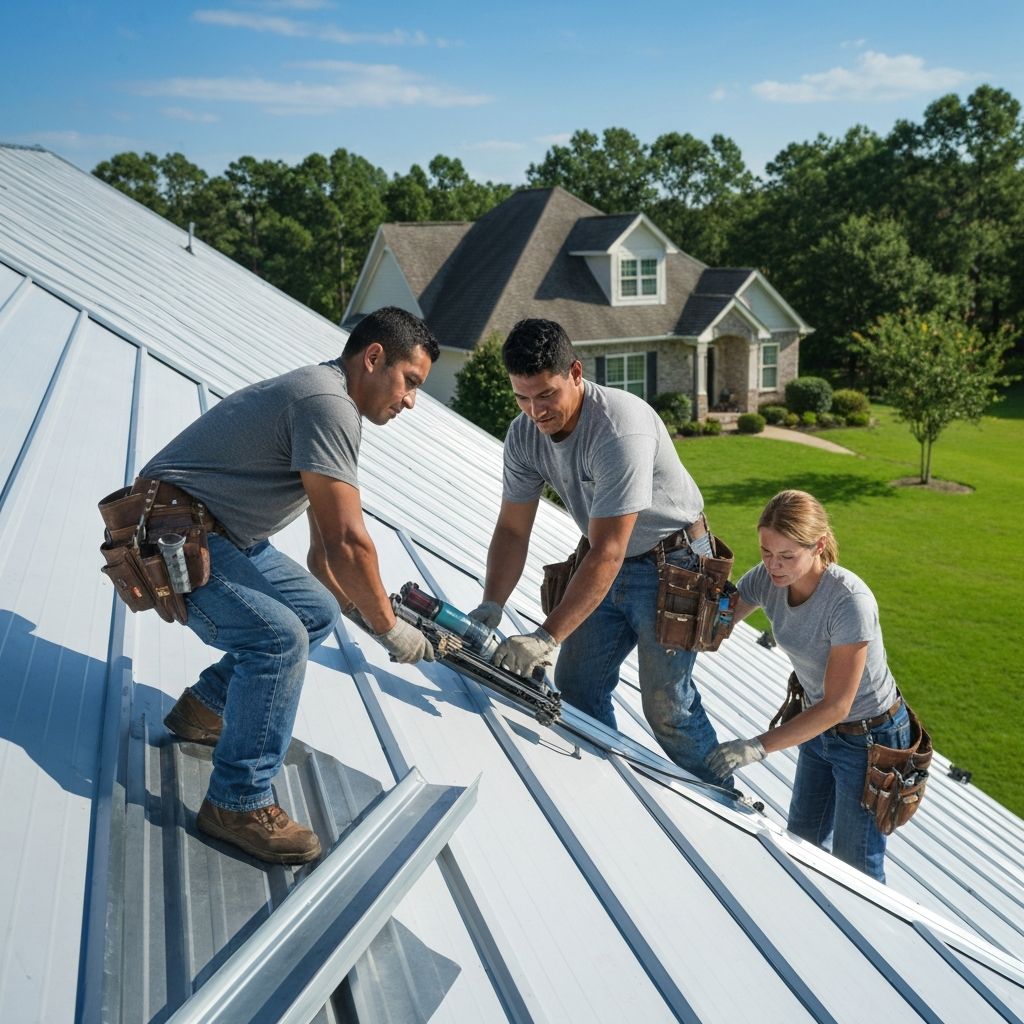
Step 3: Install the Metal Panels
Begin installing panels at the eave, starting at the end of the roof opposite the prevailing wind direction. This ensures that wind-driven rain is less likely to penetrate the panel overlaps. Overhang the first panel past the drip edge by about one to one and a half inches to allow water to drip cleanly into the gutter.
Secure panels to the roof deck using metal roofing screws with built-in neoprene washers. Drive screws into the flat area of the panel — not the rib — for most panel profiles. Space screws according to the manufacturer's specifications, typically every 12 to 24 inches along the panel's length. Do not over-tighten screws; the neoprene washer should compress slightly but not distort.
As you move up the roof, overlap each row of panels over the one below by at least six inches. Apply a bead of metal roof sealant at the overlap to ensure a watertight seal. For standing seam panels, engage the seam lock mechanism by snapping the raised seam of one panel over the adjacent panel's edge. Use a seam roller or seaming tool if required by the manufacturer.
Step 4: Cut and Fit Around Obstacles
Most roofs have obstacles like vent pipes, chimneys, skylights, and dormers that require careful cutting and flashing. Measure and mark your cuts precisely, then use tin snips or electric shears to trim panels to fit. Install appropriate pipe boots, step flashing, or custom-fabricated flashings around each obstacle, sealing all joints with metal roof sealant.
Take your time with these detail areas — they are the most common source of leaks on metal roofs. A few extra minutes spent on careful cutting, fitting, and sealing will save you from costly repairs down the road.
Step 5: Install Ridge Cap and Finishing Details
Once all field panels are installed, it is time to cap the ridge. Install foam or metal closure strips along the ridge line to seal the gap between the panel ribs and the ridge cap. Place the ridge cap over the closure strips, overlapping the panels on both sides of the ridge, and secure with roofing screws.
Inspect the entire roof for any exposed fasteners, unsealed joints, or areas where panels may need additional securing. Touch up any scratches in the metal finish with matching touch-up paint to prevent corrosion. Clean up any metal shavings from the roof surface, as these can rust and stain the finish if left in place.
Safety Considerations
Roofing work is inherently dangerous, and metal roofing presents unique safety challenges. Metal panels are slippery, especially when wet or covered with morning dew. Always wear soft-soled shoes with good traction, use roof brackets and scaffolding for secure footing, and wear a fall protection harness tied off to an anchor point at all times.
Never work on a metal roof in wet, windy, or icy conditions. Metal panels can act as sails in high winds, and a gust can rip a panel from your hands with dangerous force. Work with a partner whenever possible — both for safety and for the practical benefit of having someone to help maneuver large panels into position.
A metal roof is one of the best investments you can make in your home. With proper installation, it will protect your family and your property for decades to come, adding value, curb appeal, and peace of mind to every day you spend under it.
